Content Menu
● Understanding the Basics
>> The Shoe Last
● Drawing Different Types of Women's Shoes
>> High Heels
>> Flats
>> Boots
● Adding Details and Textures
>> Leather Texture
>> Fabric Texture
>> Embellishments
● Shading and Lighting
● Color and Finishing Touches
● Practice Makes Perfect
● Digital Tools for Shoe Drawing
● Inspiration and Resources
● Advanced Techniques
>> Perspective Drawing
>> Texture Rendering
>> Dynamic Compositions
● Common Mistakes to Avoid
● Conclusion
● FAQ
>> 1. What are the essential tools for drawing women's shoes?
>> 2. How can I improve my shoe proportions when drawing?
>> 3. What's the best way to draw shoe textures?
>> 4. How do I draw shoes from different angles?
>> 5. What are some common mistakes to avoid when drawing women's shoes?
Drawing women's shoes can be a fascinating and rewarding artistic endeavor. Whether you're a fashion designer, illustrator, or simply someone who loves to sketch, mastering the art of drawing women's shoes can open up a world of creative possibilities. In this comprehensive guide, we'll explore various techniques, tips, and tricks to help you create stunning shoe illustrations.

Understanding the Basics
Before diving into the specifics of drawing women's shoes, it's essential to grasp some fundamental concepts. Women's shoes come in a wide variety of styles, from elegant high heels to comfortable flats. Each type of shoe has its unique characteristics, but they all share some common elements.
The Shoe Last
The shoe last is a crucial concept in shoe design and drawing. It's essentially a simplified form of a foot used by professional shoe designers as a template. Understanding the shoe last will help you create more accurate and proportionate shoe drawings.
To draw a basic shoe last:
1. Start with a slightly curved line representing the sole of the foot.
2. Add a curved line for the top of the foot, connecting it to the sole at the heel and toe.
3. Draw a small circle for the ankle joint.
4. Sketch the general shape of the toes at the front.
Drawing Different Types of Women's Shoes
Now that we understand the basics, let's explore how to draw various types of women's shoes.
High Heels
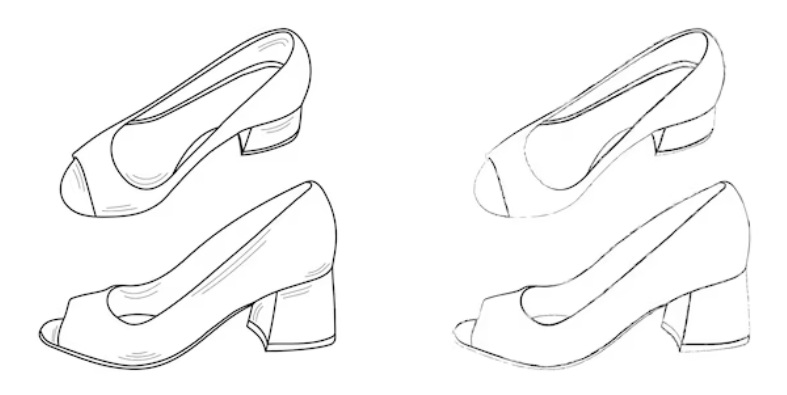
High heels are iconic in women's footwear and can be both challenging and rewarding to draw.
To draw high heels:
1. Start with the shoe last as your base.
2. Sketch the outline of the shoe, including the pointed toe and raised heel.
3. Add details like the sole, heel cap, and any decorative elements.
4. Refine the curves to create a sleek, elegant shape.
Flats
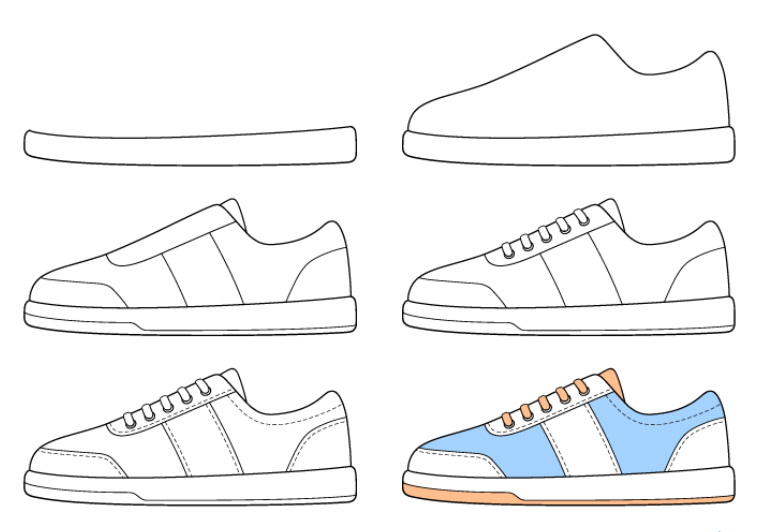
Flats are versatile shoes that can be both casual and formal. They're generally easier to draw than high heels due to their simpler shape.
To draw flats:
1. Begin with a flatter shoe last, as flats don't have the arch of high heels.
2. Sketch the outline of the shoe, keeping it close to the foot shape.
3. Add details like the toe box, sole, and any embellishments.
4. Pay attention to the opening of the shoe where the foot enters.
Boots
Boots come in various styles, from ankle boots to knee-highs. The key to drawing boots is understanding how they wrap around the leg and ankle.
To draw boots:
1. Start with the foot and lower leg shape.
2. Sketch the outline of the boot, considering its height and style.
3. Add details like zippers, laces, or buckles.
4. Pay attention to how the material folds and creases around the ankle and calf.
Adding Details and Textures
Once you have the basic shape of the shoe, it's time to add details and textures to bring your drawing to life.
Leather Texture
To create the appearance of leather:
1. Use light, parallel lines to suggest the grain of the leather.
2. Add subtle shading to create depth and dimension.
3. Include small imperfections or wrinkles for realism.
Fabric Texture
For fabric shoes like canvas sneakers:
1. Use crosshatching techniques to create a woven appearance.
2. Add small dots or stippling for texture.
3. Include seams and stitching details.
Embellishments
Don't forget to add any decorative elements that make the shoe unique:
1. Draw buckles, bows, or straps with attention to detail.
2. Include patterns or prints if present on the shoe.
3. Add metallic elements like studs or zippers with appropriate shading.

Shading and Lighting
Proper shading and lighting can take your shoe drawings from flat to fabulous.
To add shading:
1. Determine your light source and keep it consistent throughout the drawing.
2. Use darker shades in areas that would be in shadow, such as under the arch or inside the shoe opening.
3. Add highlights to areas that would catch the light, like the toe or top of the shoe.
4. Blend your shades smoothly for a realistic look.
Color and Finishing Touches
Adding color to your shoe drawings can bring them to life. Whether you're using colored pencils, markers, or digital tools, consider these tips:
1. Choose a color palette that complements the style of the shoe.
2. Use lighter and darker shades of the same color to create depth.
3. Add reflections or shine to patent leather or metallic surfaces.
4. Don't forget to color the sole and any visible interiors of the shoe.
Practice Makes Perfect
Like any skill, drawing women's shoes improves with practice. Here are some exercises to help you hone your skills:
1. Sketch different shoe styles from reference images.
2. Practice drawing shoes from various angles.
3. Create your own shoe designs, mixing elements from different styles.
4. Draw the same shoe in different materials or colors.
Digital Tools for Shoe Drawing
While traditional drawing methods are valuable, many artists and designers use digital tools for shoe illustrations. Programs like Adobe Illustrator, Procreate, or Clip Studio Paint offer features that can enhance your shoe drawings:
1. Layers for easy editing and experimentation
2. Digital brushes that mimic various textures
3. Color palettes and swatches for consistent designs
4. Vector tools for clean, scalable illustrations
If you're interested in digital shoe drawing, consider investing in a graphics tablet for more precise control.
Inspiration and Resources
To improve your shoe drawing skills, it's helpful to study the work of fashion illustrators and shoe designers. Some notable names include:
- Megan Hess
- David Downton
- Hayden Williams
Follow fashion illustration accounts on social media platforms like Instagram or Pinterest for daily inspiration and new techniques.
Advanced Techniques
As you become more comfortable with basic shoe drawing, you can explore more advanced techniques to elevate your illustrations.
Perspective Drawing
Learning to draw shoes from different angles adds depth and interest to your illustrations. Practice drawing shoes from the front, side, and three-quarter views. Pay attention to how the proportions and details change as the perspective shifts.
Texture Rendering
Mastering the art of rendering different textures can make your shoe drawings more realistic and visually appealing. Experiment with various techniques to represent different materials:
- For suede, use short, fuzzy strokes
- For patent leather, create sharp highlights and deep shadows
- For mesh or knit fabrics, use a series of small, interconnected lines
Dynamic Compositions
Instead of drawing shoes in isolation, try creating dynamic compositions. Place shoes in interesting arrangements, or draw them as part of a full fashion illustration. This can help tell a story and showcase your creativity.
Common Mistakes to Avoid
As you develop your shoe drawing skills, be aware of these common pitfalls:
1. Ignoring proper proportions: Always start with a well-drawn shoe last to ensure correct proportions.
2. Overlooking details: Small details like stitching, eyelets, and sole textures can make a big difference in the realism of your drawing.
3. Inconsistent light source: Maintain a consistent light direction throughout your illustration for believable shading.
4. Flat drawings: Use shading and highlights to create a sense of volume and three-dimensionality.
5. Stiff lines: Practice creating fluid, confident lines to give your shoe drawings more life and energy.
Conclusion
Drawing women's shoes is an art form that combines technical skill with creativity. By understanding the basic structure of shoes, practicing different styles, and adding details and textures, you can create stunning shoe illustrations. Remember that every artist has their unique style, so don't be afraid to experiment and develop your own approach to drawing women's shoes.
Whether you're sketching for fun, preparing for a career in fashion design, or creating illustrations for a project, the skills you develop in drawing women's shoes will serve you well. Keep practicing, stay inspired, and most importantly, enjoy the process of bringing beautiful footwear to life through your art.

FAQ
1. What are the essential tools for drawing women's shoes?
The essential tools for drawing women's shoes include:
- Pencils (HB, 2B, 4B)
- Erasers (kneaded and rubber)
- Sketchbook or drawing paper
- Fine-liner pens
- Colored pencils or markers (optional)
- Reference images or real shoes for observation
2. How can I improve my shoe proportions when drawing?
To improve shoe proportions:
- Use the shoe last technique as a starting point
- Practice drawing from reference images
- Break the shoe down into basic shapes before adding details
- Use guidelines to maintain consistent size and angles
- Compare your drawing to the reference frequently
3. What's the best way to draw shoe textures?
To draw shoe textures effectively:
- Study real shoes and observe how light interacts with different materials
- Use varying line weights and patterns to suggest different textures
- Practice specific techniques for leather, fabric, and other common shoe materials
- Experiment with different shading methods to create depth and realism
- Use reference images for complex textures like snakeskin or embroidery
4. How do I draw shoes from different angles?
To draw shoes from different angles:
- Start by mastering the side view, which is often the easiest
- Practice drawing basic 3D shapes (cubes, cylinders) in perspective
- Use reference images or a real shoe that you can rotate
- Pay attention to how the shoe's features change from different viewpoints
- Use guidelines to maintain proper proportions and perspective
5. What are some common mistakes to avoid when drawing women's shoes?
Common mistakes to avoid include:
- Ignoring the shoe last and proper foot anatomy
- Making the heel too thin or improperly angled
- Forgetting to add details like soles, insoles, or stitching
- Using inconsistent light sources for shading
- Over-complicating designs, especially when starting out
- Neglecting to study real shoes and relying too much on imagination


