Content Menu
● Identifying Elastic Problems in Chelsea Boots
● DIY vs. Professional Repair
● Tools and Materials for DIY Elastic Repair
● Step-by-Step Guide to Replacing Elastic Gussets
● Professional Elastic Replacement
● Maintaining Elastic on Chelsea Boots
● Conclusion
● FAQ
>> 1. How do I know if the elastic on my Chelsea boots needs to be replaced?
>> 2. Can I replace the elastic on my Chelsea boots myself?
>> 3. How much does it cost to have the elastic replaced professionally?
>> 4. How long does it take to replace the elastic on Chelsea boots?
>> 5. How can I prevent the elastic on my Chelsea boots from stretching out?
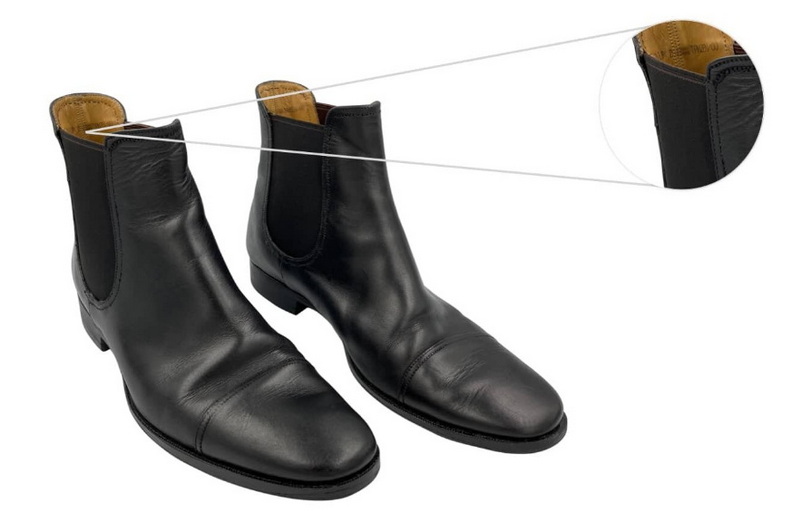
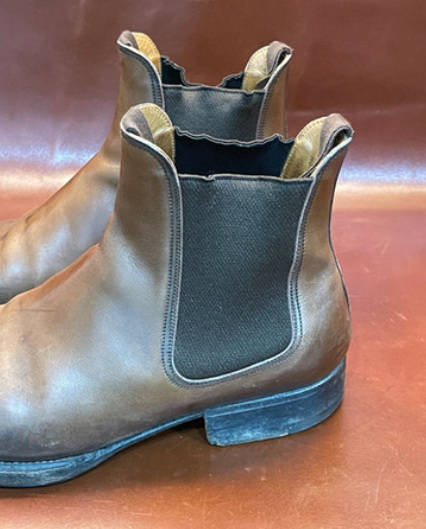
Chelsea boots are a timeless footwear choice, loved for their sleek design, comfort, and versatility. A key feature of these boots is the elastic side panels, also known as gussets, which allow for easy slip-on and a snug fit. However, over time, the elastic can lose its elasticity, becoming stretched, frayed, or loose, which compromises the boot's fit and appearance.
This article provides a comprehensive guide on how to fix the elastic on Chelsea boots, covering everything from identifying the problem to step-by-step repair instructions and maintenance tips. Whether you're a DIY enthusiast or prefer professional assistance, this guide will help you restore your Chelsea boots to their former glory.

Identifying Elastic Problems in Chelsea Boots
Before embarking on a repair, it's essential to accurately diagnose the issue with the elastic gussets. Common problems include:
- Stretching: The elastic loses its ability to retract, causing the boots to fit loosely around the ankle.
- Fraying: The edges of the elastic become worn and unravelled, affecting the boot's aesthetics.
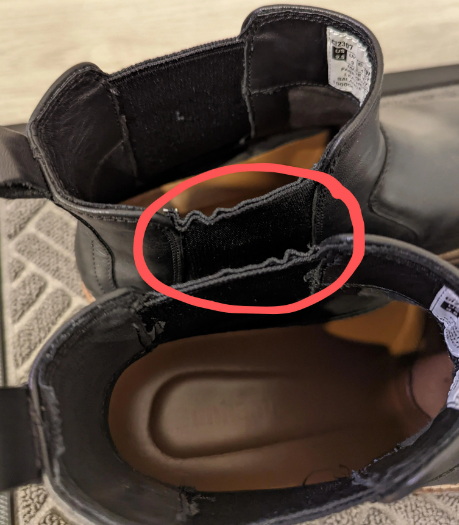
- Looseness: The elastic detaches from the upper or lining of the boot, creating gaps and instability.
- Tears or Holes: Physical damage to the elastic, compromising its function and appearance.
- Discoloration: Fading or staining of the elastic, making it look old and worn.
If you notice any of these issues, it's time to consider repairing or replacing the elastic gussets.
DIY vs. Professional Repair
Deciding whether to fix the elastic on your Chelsea boots yourself or seek professional help depends on several factors:
- Boot Value: For high-end or designer boots, professional repair is recommended to avoid potential damage and ensure a quality finish. For lower-end boots, a DIY approach can be a cost-effective solution.
- Skill Level: Replacing elastic requires basic sewing skills and familiarity with shoe repair techniques. If you're uncomfortable with DIY projects, a cobbler is the better option.
- Tools and Materials: DIY repair requires specific tools and high-quality elastic. If you lack these resources, professional repair may be more convenient.
- Time Commitment: DIY repair can be time-consuming, while a cobbler can complete the job more quickly.
Consider these factors to make an informed decision about whether to tackle the repair yourself or enlist the help of a professional.
Tools and Materials for DIY Elastic Repair
If you choose the DIY route, gather the necessary tools and materials before starting:
- Seam Ripper: For removing old stitches without damaging the leather.
- Small Sewing Scissors: Preferably with curved tips, for precise cutting of threads and elastic.
- High-Quality Elastic Gusset Material: Choose elastic that matches the original in color, width, and elasticity.
- Boot Repair Glue: A strong adhesive specifically designed for leather and elastic.
- Shoemaker's Awl: For creating or widening stitch holes in the leather.
- Shoe Repair Needles: Two needles for hand-sewing, or a heavy-duty sewing machine.
- Waxed Shoemaker's Thread: Choose a color that matches the elastic and boot.
- Leather Cleaner and Conditioner: For cleaning and conditioning the leather before and after the repair.
- Clamps or Clips: To hold the elastic in place while the glue dries.
- Ruler or Measuring Tape: For accurate measurements of the elastic and boot opening.
- Pencil or Fabric Marker: For marking cutting lines on the elastic.
Having these tools and materials on hand will streamline the repair process and ensure a professional-looking result.

Step-by-Step Guide to Replacing Elastic Gussets
Follow these steps to replace the elastic gussets on your Chelsea boots:
1. Prepare the Work Area: Set up a clean, well-lit workspace with all your tools and materials within reach.
2. Remove the Old Elastic:
- Use a seam ripper to carefully remove the stitches holding the old elastic in place. Focus on cutting the threads on the inside of the boot (the liner) to avoid damaging the outside.
- Once the stitches are cut, gently pull the old elastic free from the liner and upper. It may be glued in place, so use a bit of force if necessary.
- Remove any remaining threads or glue from the area.
3. Measure and Cut New Elastic:
- Measure the opening in the boot where the elastic will be inserted. If the old gussets are severely stretched, do not use them as guides for cutting the new ones because the new gussets will be too big and will fit loosely. Instead, measure the gap in the boot itself and cut your new elastic gussets to fit. Be sure to include a 3/8" overlap all the way around to make the stitching easier.
- Use these measurements to cut four new pieces of elastic (two for each boot). Ensure the elastic is cut straight and the edges are clean.
4. Glue the New Elastic in Place:
- Apply a thin, even layer of boot repair glue to the edges of the elastic that will be attached to the liner and upper.
- Carefully insert the elastic into the opening, positioning it so that the edges align with the original stitching lines.
- Press the glued edges of the elastic firmly against the liner and upper, using clamps or clips to hold it in place while the glue dries. Allow the glue to dry completely according to the manufacturer's instructions.
5. Stitch the New Elastic:
By Hand:
- Thread two needles with waxed shoemaker's thread.
- Starting at the top of one side of the gusset area, run one needle through the top hole on the upper, through the gusset and the liner's corresponding hole.
- Pull the thread through these holes until you have an equal amount on either side of the hole.
- Then make the next stitch as follows: the upper needle stitches down through the next hole, and the lower needle stitches up through it.
- Continue stitching this way, with both a down-stitch and an up-stitch through each hole, all the way around the U-shaped gusset area.
- Because your boots already have stitch holes from the original gussets, the thread should pull through easily. If any of the holes are blocked, use a shoemaker's awl to clear them.
- You may use one very long piece of thread to stitch the entire gusset, or you may cut it in two and sew each half from the top to the bottom of the U-curve.
- For aesthetic reasons, knot your thread on the boot's interior (on the liner side).
Sewing Machine:
- Use a heavy-duty walking-foot sewing machine with a leather needle.
- Stitch along the original stitching lines, ensuring a secure and even seam.
- Backstitch at the beginning and end of the seam to prevent unraveling.
6. Finishing Touches:
- Trim any excess thread from the stitching.
- Apply leather cleaner and conditioner to the boots to restore their appearance and protect the leather.
Professional Elastic Replacement
If you prefer professional repair, research local cobblers or shoe repair services with experience in Chelsea boot repairs. Look for businesses that:
- Use high-quality elastic materials.
- Have skilled technicians with experience in boot repairs.
- Offer a satisfaction guarantee.
- Provide a reasonable turnaround time.
The cost of professional elastic replacement typically ranges from $25 to $100 per panel, depending on the location and complexity of the repair.
Maintaining Elastic on Chelsea Boots
To prolong the life of the elastic on your Chelsea boots, follow these maintenance tips:
- Proper Storage: Store boots with shoe trees to maintain their shape and prevent the elastic from stretching.
- Avoid Over-Stretching: When putting on or taking off boots, avoid pulling excessively on the elastic.
- Regular Cleaning: Clean the elastic regularly with a damp cloth to remove dirt and grime.
- Conditioning: Apply a leather conditioner to the elastic to keep it supple and prevent it from drying out.
- Avoid Extreme Conditions: Exposure to extreme heat, cold, or moisture can damage the elastic.
- Use a Shoe Horn: Using a shoe horn can minimize the stress on the elastic when putting on the boots.
Conclusion
Replacing the elastic on Chelsea boots is a straightforward process that can significantly extend the life and improve the appearance of your favorite footwear. Whether you choose to tackle the repair yourself or seek professional help, following the steps outlined in this guide will ensure a successful outcome. Regular maintenance and care will further prolong the life of the elastic and keep your Chelsea boots looking their best for years to come.

FAQ
1. How do I know if the elastic on my Chelsea boots needs to be replaced?
If the elastic is stretched out, frayed, loose, or torn, it's time to consider replacing it. A loose fit around the ankle or difficulty slipping the boots on and off are also signs of worn elastic.
2. Can I replace the elastic on my Chelsea boots myself?
Yes, if you have basic sewing skills, the right tools, and high-quality elastic, you can replace the elastic on your Chelsea boots yourself. However, for high-end boots, professional repair is recommended.
3. How much does it cost to have the elastic replaced professionally?
The cost of professional elastic replacement typically ranges from $25 to $100 per panel, depending on the location and complexity of the repair.
4. How long does it take to replace the elastic on Chelsea boots?
DIY elastic replacement can take several hours, while a professional cobbler can usually complete the job in a day or two.
5. How can I prevent the elastic on my Chelsea boots from stretching out?
Store boots with shoe trees, avoid over-stretching the elastic, clean and condition the elastic regularly, avoid extreme conditions, and use a shoe horn when putting on the boots.
The love for beauty will never change, please Contact Us and choose what you like!


